Fishing is a fun pastime that gets you outdoors in pristine nature, outsmarting some big, beautiful fish.
For beginners, it can seem confusing to know where to start. After all, there’s plenty of gear that you’ll need to make the magic happen, and the choices seem endless.
Thankfully, our guide can get you started on the right foot. We’ve compiled everything you need to know about fishing gear basics. Let’s cast out!
Fishing Essentials List
To begin, we’ll start by presenting you with the fishing gear basics checklist of what you’ll need to head out onto the water. In this guide, we’ll focus on fishing in freshwater with a rod and spinning reel, since this involves some of the easiest fishing equipment for beginners to get used to.
Once you get your fishing addiction down pat, there are plenty of other types of fishing techniques to try that utilize more complex fishing gear, including fly-fishing, saltwater fishing, or ice fishing.
You can find the basic fishing tools and equipment you need at your local tackle shop or sporting goods store.
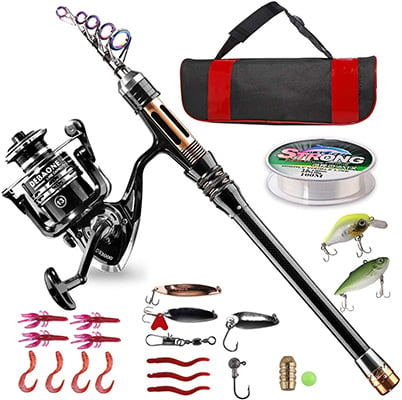
Here is a brief list of fishing essentials for beginners:
Alright, now that you have your checklist ready, let’s head to the tackle shop!
How to Get Your Fishing License
You can’t catch a fish legally unless you have a fishing license, so this should be the first order of business before slapping a worm on a hook.
Thankfully, the process to get one is simple and inexpensive. Of course, the price depends on the state you live in and your residency status.
Nowadays, most licenses are sold online, or you can inquire for one at your local fishing tackle shop. Even some convenience stores carry them.
You can purchase a day license for $20 or less (depending on the state) or opt for an annual license if you’re serious about your new hobby. This can cost anywhere between $30 and $150.
Choosing Your Spinning Reel and Rod
After you’ve got your fishing license, it’s time to do some shopping. The foundation of your fishing gear essentials is the reel and rod.
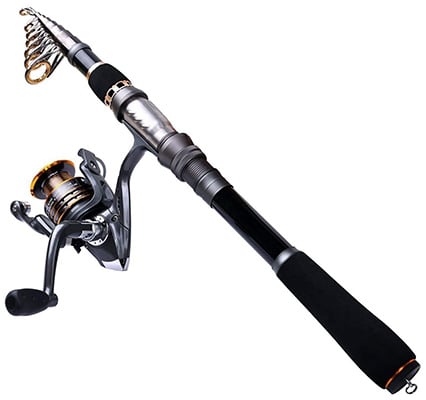
The spinning reel is ideal for beginners because you can switch it between the right or left hand, whichever side is most comfortable for you. It’s also much easier to learn how to cast with this type of reel as opposed to a conventional reel.
There are baitcasting reels that are equipped with a line guide to help the line spin onto the reel in the right form without tangling. This is a versatile reel that can be used in both fresh and saltwater, with the capacity to handle larger fish.
You can also purchase a spinning reel and rod combo, which means both are sold together and are therefore much easier to set up since they already match.
Choosing Your Lures and Bait
After you’ve got your fishing rod set up, it’s time to choose the types of lures and bait you want to cast out.
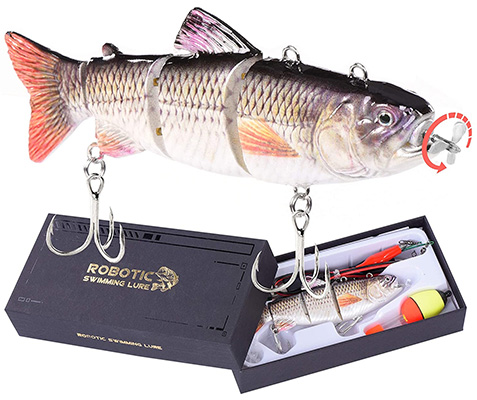
Fishing lures are creative decoys designed to attract fish, while bait attracts them since they are alive, moving on their own through the water. Generally, it’s a good idea for beginners to start with live bait, then move on to lures once comfortable.
A tackle box is handy to carry your lures and tools, such as needle-nose pliers for removing lures from the fish’s mouth and a rubber net for scooping the fish out of the water once caught.
Bobbers are an important piece of gear to consider as well. These floating balls are tied onto your line and “bob” to let you know when something is biting the bait.
6 Best Types of Fishing Lures for Beginners
If you’re stuck on what lures to purchase, this is a list of the most popular types that are especially easy for beginners to use.
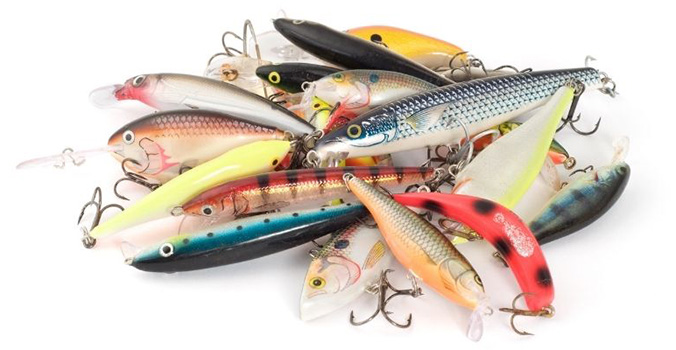
Stick Bait: These basic, versatile lures are soft to the touch and come in a multitude of colors. Some say that the most successful colors are chartreuse, green pumpkin, and cinnamon. They can be used on almost any plastic rig.
Curl Tail Grub: This doesn’t look fancy, but the curl tail grub is one of the most versatile lures for catching almost any type of fish. It’s best to attach it to a barbed jig.
Spinnerbait: The spinnerbait is a bouncy lure that catches attention underwater by bouncing over sunken pieces of wood and boulders. It can also move through tall reeds, but be careful that it doesn’t snag. White, green, and silver blade are the most common colors.
Square Bill Crankbait: This is a great choice for fishing in shallow water up to 8 ft. deep.
Skirted Bass Jig: The skirted bass jig is what you move on to after mastering the first four lures on this list. There is a special flipping and pitching technique that works well to catch Bass with this lure. Popular colors include brown and black.
Lipless Crankbait: For deep water fishing, this lure is ideal and can work in any level of water. It makes a rattling sound when pulled up, which attracts fish from far away.
Different Types of Live Bait and How to Keep Them Alive
Live bait is the easiest way to catch fish without having to know the special techniques of how to move the line, like with lures. The most common types of bait include:
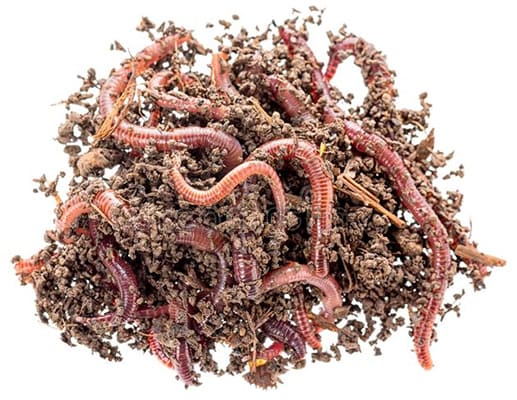
The tricky part though is keeping the bait alive until you go fishing. Worms, leeches, crickets, and grasshoppers are fairly easy to transport in a small dirt cup or container. It’s the shrimp and minnows that tend to be fragile.
With shrimp, it’s paramount to ask the store for a bucket containing water from the original tank they were kept in. The shrimps are already adapted to this water, ensuring longevity if it’ll be a few days until you go fishing.
Change the water daily, and install a mesh-type liner around the bucket to prevent the shrimp from piling up and suffocating on the bottom.
Minnows are a different story. They become stressed easily, which shortens their lifespan. Like shrimp, they need to be kept in a container with water immediately after purchase.
Temperature is essential for bait, as it impacts how active they become. Warm water makes minnows move, but keep in mind that the more active they are, the more oxygen they consume.
To ensure there is plenty of oxygen for your bait, you’ll probably need to add an aeration pump to your basic fishing gear for beginners checklist (if you plan on using live bait).
There are also bait tanks that automatically balance the water temperature to ensure your minnows are nice and cozy.
Useful Knots to Know
If you’ve made it this far in our guide, then you know all about the different types of lures and bait you need to catch a fish, and your rod and reel are set up and ready to go.
Now, you’re probably wondering how to use some of these equipment. Truth be told, practice is the best teacher. However, we’ll go over a few crucial techniques for handling the rod and fishing line, starting with some of the most useful knots.
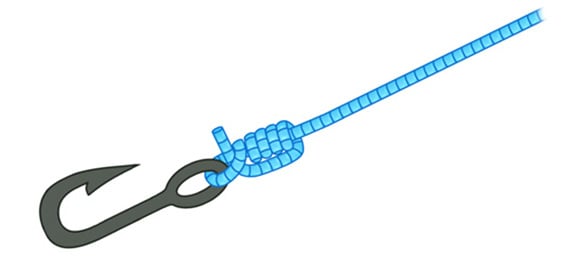
The Clinch Knot
The Clinch Knot is one of the most common knots used for tying the fishing line to a swivel, lure, or hook. Here’s how to do it:
1. Pull about six inches of the fishing line through the eye of the lure, hook, or swivel.
2. Double the line back and twist 5-7 times.
3. A small hoop should’ve formed above the eye of the lure. Pass the end of the line through this hoop, then again through the larger hoop that emerges.
4. Pull the line so the coils tighten against the eye of the lure.
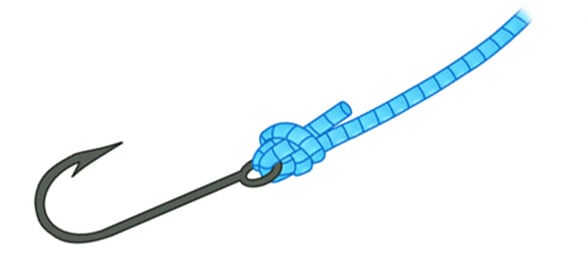
The Palomar Knot
This is another popular way to tie a line onto a hook or lure. It is regarded as one of the strongest, most reliable fishing knots. Here’s how to do it:
1. Start by doubling six inches of the line, then pass the end of the loop through the hook’s eye. If the hook eye is smaller, only pass the loop through once, doubling back to pass the end of the line through the eye once more in the opposite direction. Six inches of the doubled line should be left outside of the hook eye.
2. Tie an overhand knot and make sure it’s loose. The hook should hang from the bottom.
3. Take the overhand knot between your thumb and forefinger and pass the loop over the hook, sliding it above the eye.
4. Tighten the knot down onto the eye by pulling on the standing line and tag end. The hook can now rotate freely in the knot.
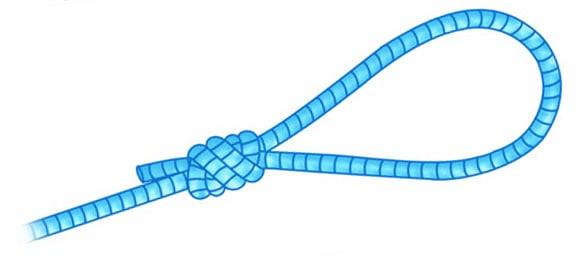
The Double Surgeon’s Knot
This is another useful knot for joining two lines that are of equal or unequal diameters together or attaching a line to a leader. Here’s how to do it:
1. The leader line needs to be parallel to your main line so that they overlap.
2. Pass the long end of the leader and the tag end of the main line through the loop to create an overhand knot.
3. Follow step two again to create a second overhand knot.
4. Pull all four ends to tighten the knot.
How to Cast
If you’re not tangled up in the fishing line, then you’re ready to discuss casting. As mentioned, a spinning reel is the easiest setup for effortless casting—especially for beginners.
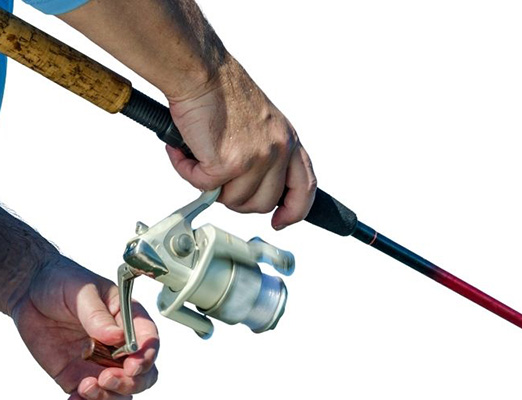
To cast with a spinning reel, you’ll start by letting out about six inches of line at the end of your rod, keeping the reel below your hand.
At this point, the reel should automatically deploy a thin wire arm called a bail, which stops the line from unraveling.
You’re ready to cast now. Flip the bail and hold the line in place with your finger so it doesn’t unravel. Bring the tip of the rod up and behind your body and cast forward, removing your finger from the line so it flies out into the water.
Flip the bail back into place to stop the line from being let out, and you’re ready to fish!
How to Hook the Fish
So you’ve got your baited hook or lure, and you know how to cast the fishing line and use a spinning reel, but what happens when you hook your first fish?
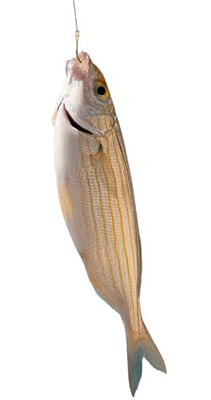
Now it’s time to learn how to handle the hook or lure. This is important because the fish can spit out the hook or break the line if the hook is not set properly in its mouth once it bites.
Setting the hook involves just the right amount of pressure and perfect timing, so this is a technique that takes practice.
As soon as the fish bites, you’ll see the bobber bounce in the water or fully submerge. At this point, you need to point the tip of the rod upwards and reel in the slack, then quickly tug the line a few inches with considerable pressure to hook the lure firmly in the fish’s mouth. This prevents the fish from escaping or sustaining a severe injury.
Once the hook is set, your job still isn’t done. The fish is going to fight the line, and your focus needs to be on allowing the fish to tire itself out before reeling it to the side of the boat or shore.
You don’t want to reel the fish in right away as you see in cartoons, as you risk snapping the line due to a powerful, heavy fish fighting against it. The best way to tire out the fish is to keep your line taut and “play” the fish until it can be reeled in with little effort.
Landing the Fish
Still with us? Because now it’s time for the grand finale! The moment you’ve been waiting for is here. You’ve used your fishing gear like a pro, and it has proven reliable in landing you a fish.
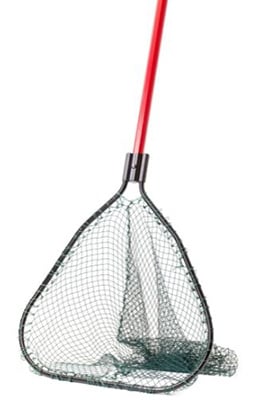
The fish is hooked, it’s tired, and you’re ready to reel it in. Use your net to scoop it up once close to shore to prevent it from injuring itself on the shore.
Remember to handle it gently, refraining from touching the gills or squeezing the stomach. Do not keep the fish out of water for more than you’re able to hold your breath. Snap your pictures, revel in your accomplishment, and release that baby back into the watery world.
Guide to Fishing Gear Basics Conclusion
We covered quite a bit of information in our guide to fishing gear basics for beginners, but if you’ve made it this far, then you should have a clear understanding of the type of equipment you need, how to set it all up, and how it all works in action.
Another solid piece of advice is to visit your local fishing tackle store or sporting goods store and speak with a sales rep. They know fishing inside out and can help you get set up with the right equipment while also providing invaluable insight on the best bait to use and local fishing spots to try out.
Resources and References:
- Fishing Knots, NetKnots.
- Buying a Fishing License, U.S. Fish & Wildlife Service.
- How to Fish with Lures, TakeMeFishing.org.