Rawhide is made from green hide (i.e. raw skin that’s fresh and hasn’t been processed, not even fleshing.) The process for making rawhide serves removing the hair and any remaining tissue and fat, and leaving you with a clean, dry skin that can be put to a variety of practical and artistic uses.
Making rawhide is a relatively simple process that is a great addition to your self-sufficiency skills. In previous posts, we’ve taken a look at tanning hides with the fur on and off to produce high-quality leather and hides that can be used for making leather goods, blankets, wall hangings, or sold as a way to make money when living in the wilderness. Rawhide lends itself to a variety of uses, which we’ll explore in greater detail below. It’s frequently cut into strips to make rope and binding, with large sections being used to make drum heads, lampshades, bow backing, knife sheaths, quivers, powder holders, and even canteens.
While you can make rawhide from any animal hide, for starters, you may find that using a deer hide is easier as you’ll have more to work with -and more salvageable hide should you make a mistake.
Making and Using Rawhide Process
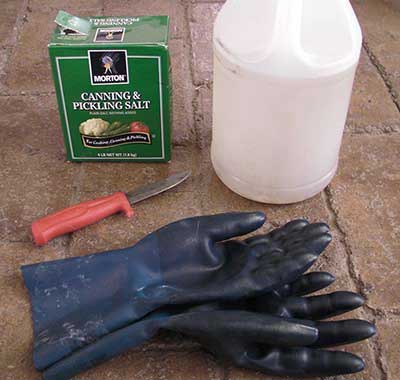
Removing the Hair
Materials Needed
As with all aspects of working with animal hides, you’ll want to wear gloves throughout this process. This isn’t just to help your hands clean but to protect you from harsh chemicals.
Rawhide needs to have the grain layer on but not the epidermis, it gives the rawhide strength and makes it look nicer. For this reason, the process for removing hair as outlined in the previous post on Brain Tanning Leather is not appropriate. A different method is required for removing the hair for rawhide that keeps the grain layer intact. However, rawhide can be made with the hair still on.
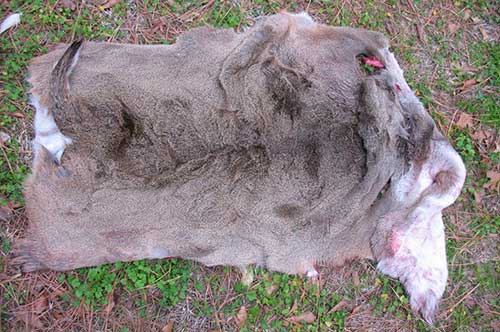
To begin, it doesn’t matter if the hide is green or if it has been fleshed. Both the lye in the ash and the hydrated lime produce a chemical reaction that neutralizes the acid in the decomposing fat, thus preventing the hide from getting fat burned. Both also serve to eat away at any remaining muscle or fat, allowing it to easily come off later.
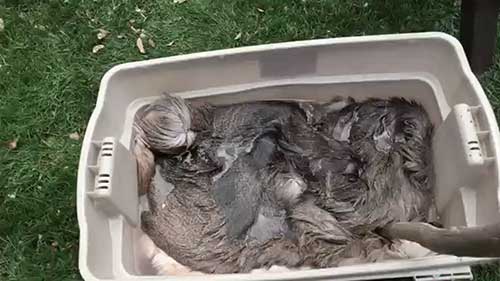
Soak the hide in a solution of water and either hydrated lime or a combination of hardwood ash and softwood ash. Hardwood ash has more lye in it and, alone, it is too strong (as is straight lye.) It can cause the hide to swell and crack along the grain line as it soaks.
Fill your container about 1/8 of the way full with ash or lime, then fill about 2/3 of the way with water. Give it a stir and then place the hide into the water. Use your stirring stick to push the hide in and make sure that it is submerged. You can use a rock to help keep the hide submerged.
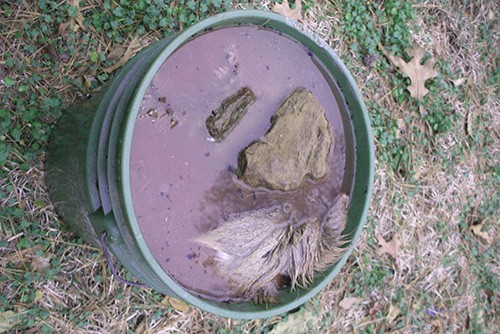
NOTE: When choosing a container to soak the hide in, it is paramount that the container be large enough to thoroughly stir the hide about. This is something that is easy to get wrong, but that stirring is vitally important where quality is concerned.
Let the hide soak for at least a week, stirring every day. It will need to soak longer in colder weather than it will in warm weather. Longer soak time, even as long as a month, will not hurt the hide and it is far better to soak the hide too long than not long enough.
After a week, pull on some of the hair to see if it comes out. If it comes out easily, the hide is ready to be dehaired. If not, let it soak a few more days. Continue to stir the hide daily and check to see if the hair slips out easily before proceeding to the next step.
When the hair slips off the hide easily (i.e. clumps of hair fall off in your hands with little effort) remove the hide and place it on your fleshing beam. If you don’t have a fleshing beam you can also use a log set against a tree, a wooden sawhorse, or even just lay the hide flat on a picnic table outside, or on a tarp spread flat on the ground.
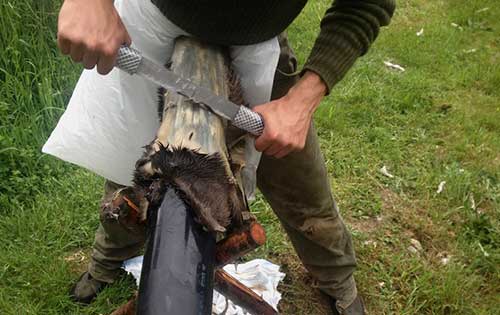
Use a dull drawknife, or a knife dulled to where it can’t cut your skin, to remove the hair from the hide. If soaked long enough, the hair will fall off just from your touch, so be gentle as you work the drawknife across the hide. Take care not to damage the grain layer, as this will give your finished rawhide a nicer appearance. You don’t need to press hard, just gently pull it along the hide. It’s alright if the epidermis is removed, but care should be taken not to damage the grain layer.
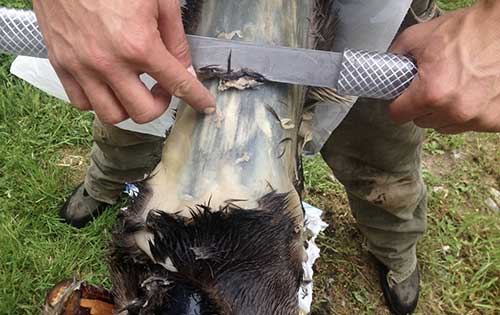
Once dehaired, flip the hide over and be sure to get as much of the membrane off of the flesh side as possible. Again, be gentle. Pressing hard will cause the grain layer on the hair side of the hide to come loose. The lye in the wood ash or lime will have helped to eat away at any remaining flesh and/or fat, making it easy to remove so you won’t need to press or scrape hard with the fleshing tool; just run it across the hide.
Soaking and Neutralizing
Materials Needed
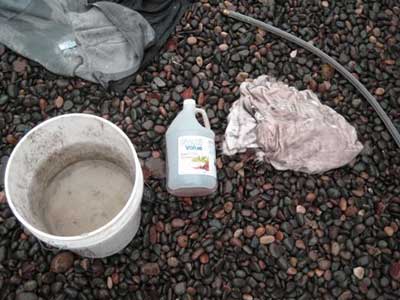
Once the hide is dehaired and fleshed, rinse it in clean water. Now, place the hide in water mixed with baking soda (1/2 box to 5 gallons of water). This is to neutralize the alkaline lime/lye and bring the ph of the hide back down to about 7, which is neutral. Allow the skin to soak for a day, then pour off the water and soak in baking soda and water for another day. The hide shouldn’t look swollen by the end of the day’s soaking. If it does appear swollen at all, pour off the water and soak in clean water and baking soda for another day.
Once the hide has soaked and doesn’t appear to be swollen at all, remove the hide and rinse in clean water. Now soak in a mix of water and vinegar (1/3 cup to 5 gallons of water). This is to further neutralize the hide and bring the ph closer to 7. Soak it for 30 minutes to overnight; any longer isn’t necessary.
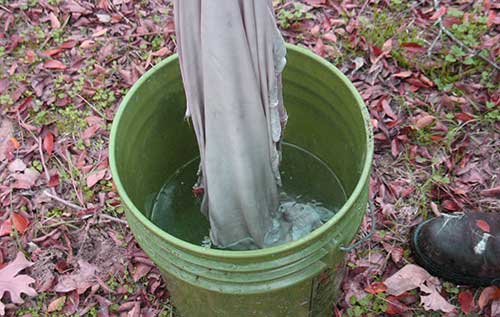
This process of soaking in baking soda and vinegar also helps to neutralize odors, making for odorless finished rawhide. However, it is important to note that dry rawhide in a wet environment will always smell. The moisture in the air is absorbed by the rawhide, drawing out smells. But, generally, dry rawhide made in this method will not stink.
A final rinse in clean water and the hide is now ready to be dried and stretched.
Drying and Stretching
Materials Needed
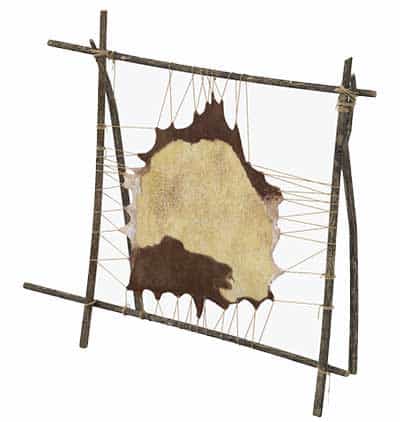
Once the hide has been soaked and rinsed, it’s time to stretch it. This can be done with a drying rack or you can tack it to a shed wall. If stretching and drying on a drying rack, carefully poke holes along the outer edge of the hide, about ½ inch in and spaced about 2-4 inches apart (or whatever makes sense, based on the shape of the hide.) Run twine through each hole and tie to the drying rack.
Whether tying to a drying rack or tacking to a wall, stretch the hide from opposite sides. That is, start by securing the top, then pull the bottom of the hide and secure in place. Now stretch and secure one side, then the other. The goal is to stretch it just enough to help it keep its shape. The hide will shrink up to 1/3 as it dries, so stretching it too tight will cause it to tear or to dry too thin -both of which are bad.
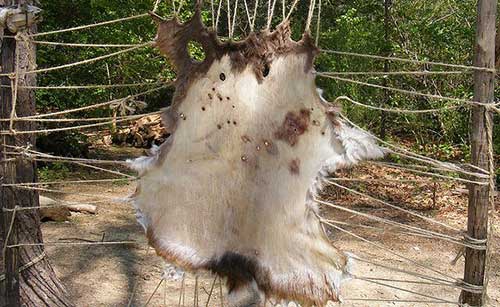
Once stretched, the hair side can be gently worked again to remove any of the dark epidermis that may still be present. Again, care must be taken not to damage the grain layer. If you work the hide a bit more, the hide will sag a bit and need to be stretched a bit more. If you have specific plans for the finished rawhide and want it to be transparent, allow it to have some slack as it dries. For an opaque hide, continue to stretch it as it dries, as tightly as you can without damaging it.
Allow the hide to hang for a few days until thoroughly dry. Once dry, you can take the hide down, trim off the rough edges, and roll it up to store it for later use.
Using Rawhide
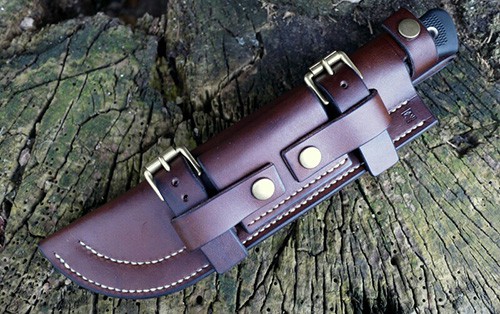
Rawhide can be used for so many things that you may find it becomes one of your favorite mediums around the homestead. Use basically falls into lacing or large sections. Lacing can be used for binding items together, such as is seen in primitive stone axes, lacing together large sections of rawhide, or for creating shelter, jewelry, or even bull whips and lariats. Large sections of rawhide can be used to make drum skins or containers such as powder flasks, canteens, or knife sheaths.
Regardless of how you will use your rawhide, it first needs to be wetted so that it becomes soft and malleable again.
NOTE: This method should not be used to make rawhide for dog chew toys and treats.
To make binding or lacing, wet the hide and spread it flat. Working from the outside edge, cut the hide into a single strip, working around the edge in a spiral until you arrive at center and the entire hide has been cut into one single lacing. This wet lacing can be rolled up into a ball and allowed to dry for future use (even dry, it will be flexible enough to unwind and cut off lacing to the desired length) or cut to the desired length and put to immediate use.
To use larger pieces of rawhide to make containers, such as a powder flask, canteen, or knife sheath, you will need a mold. The wet rawhide is placed over the mold and allowed to dry. Once dried, the rawhide is removed from the mold, trimmed to shape, and can be laced together with rawhide lacing or joined with metal rivets.
Making and Using Rawhide Conclusion
How exactly you use your homemade rawhide is limited only by your imagination. Though starting out with simple lacing will give you a good idea of how to work with it and what it can be used for. The steps outlined above can be used to make rawhide for your personal use but it will produce high-quality rawhide that you can feel proud enough of to sell.