Learning how to properly sharpen and care for your knife is one of the most basic and important skills you’ll need to learn when it comes to survival and outdoor living.
Your knife is your basic tool, an extension of yourself that helps you to prepare and eat food, construct tools, build a shelter, and defend yourself when worse comes to worse. But an improperly sharpened and cared for blade will have a greatly reduced life, wearing out and not holding an edge.
Plus, a dull knife is a dangerous knife. It requires you to apply more force which increases the chance of injury. Cuts from a dull blade are also more raggedy, being more likely to become infected and taking longer to heal. A sharp knife, on the other hand, requires less force as it cuts easier. And should you cut yourself on accident, the cut is likely to be less deep and will be smooth, healing quickly and with less chance of scarring.
To help you build a good foundation for all your outdoor and wilderness skills, or maybe to just help you brush up on the basics, here’s a look at everything you need to know when it comes to sharpening knives.
Types of Sharpening Stones
Sharpening stones are not created equal. There are a few different types of sharpening stones that require slightly different approaches to use. The most common type are carborundum which can be used wet or dry, but will be ruined if used with oil.
Stone Usage
When purchasing a stone, it should say on the packaging what type of stone it is and if it is designed to be used wet, dry, or with oil. If it is an oil stone, you can use a light mineral oil or honing oil.
Coarse vs Fine Grit
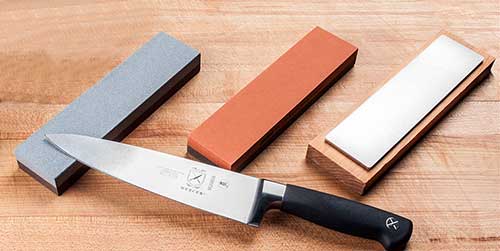
Many stones will also have a number denoting how coarse or fine the grit is; the lower the number, the coarser the grit. Many stones will also be double-sided with a coarse grit side (to grind the steel down) and finer grit side (used for honing the edge.)
Natural Stones
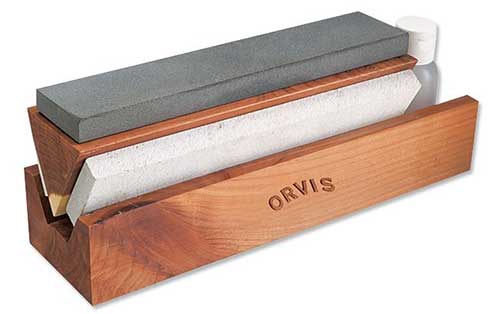
Natural Stones are unique in that they renew themselves. These stones are naturally constructed in a way that creates layers. When a layer has been worn through, another layer is revealed that produces a fresh sharpening edge. The downside to these types of stones is that they will eventually bow in the middle and could break. However, it is important to note that this happens only after years of use.
Diamond Stones
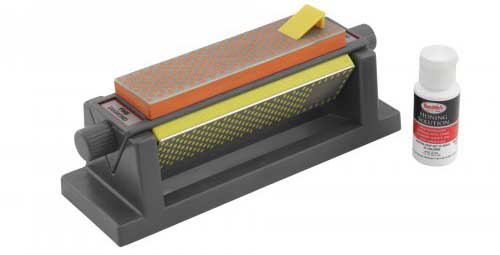
Diamond stones consist of a metal or composite base with nickel plated micron-sized diamonds along the exterior. These sharpening stones are durable, lasting many years as they won’t bow out in the middle or wear down from use.
Cleaning after use will help keep steel shavings from building up among the diamonds and guarantee a good surface against which to sharpen your knife. They can be used wet, dry, or with a mineral or honing oil.
Sharpening Your Knife
The process of sharpening a knife is deceptively simple, although it becomes much easier with experience, of course. You only need a sharpening stone to do so, although placing a towel beneath the stone and setting it on a table or countertop while you sharpen the blade is convenient. This will help to keep the stone from moving about and help to prevent injury.
To begin, wet your stone if it needs to lubricated for use. Keep in mind that you’ll want to use the same type of lubricant every time with your stone. That is, if you’ve always used water then stick with water, if you’ve always used mineral oil then stick with mineral oil. Switching between different types of lubricant is ill advised as it’s difficult to truly get all of the oil off of the stone should you want to use it with water again. Of course, a stone that can be used wet or dry can be used either or if you stick with water.
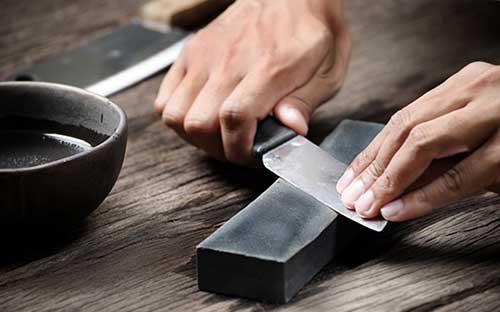
For best results, it helps to know the angle your knife has been previously sharpened at. Of course, if you have an older knife or one that was passed on to you, this may be impossible to determine. In general, a shallower angle will produce a nice sharp edge -but it won’t hold that edge as long as a deeper angle. A good rule of thumb is to keep the angle between 10-degrees and 30-degrees, with around 20-degrees being good if you’re not sure what the blade was last sharpened at.
There are sharpening guides available that you can place beneath the blade to help hold it in place while sharpening the knife. They aren’t necessary, but they do make this process easier. Otherwise, you need to have a good eye for angles and try to hold the blade at the proper angle best you can. Of course, if you don’t have a sharpening guide and can’t tell a 15-degree angle from a 30-degree angle you can still sharpen your knife and get good results. You may not get the best results possible, but you’ll still have the satisfaction of having a sharp knife that you sharpened yourself.
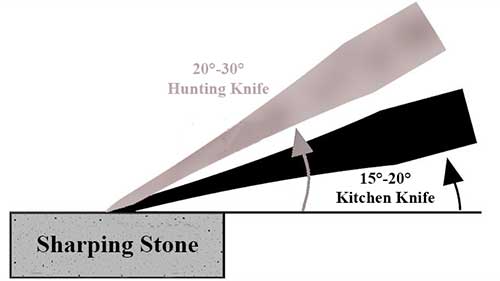
To begin, start with the course grit side of the stone up. The first step is to grind the steel, afterwards, you’ll flip the stone over and use the fine grit side to finish the sharpening and hone the blade. Holding the knife steady, drag the side of the blade across the stone. You should be pulling the knife toward you. Continue on one side until you’ve gone through about half of the steel along the edge. Now flip the knife over and grind the other side.
NOTE: if you have a single edged blade, do not flip it over and grind the other side. Skip to the next step.
You’ll know you’ve ground down enough steel on both sides due to the formation of a burr. It may not be visible, but if you run the pad of your thumb against the side of the moving toward the sharpened edge, you’ll feel the burr catch on your skin. Steep naturally produces a burr when being ground and sharpening your knife in the manner described here helps to prolong the life of your knife.
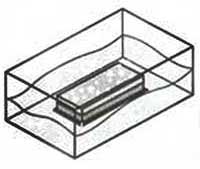
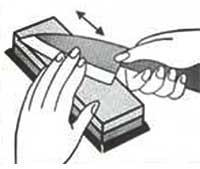
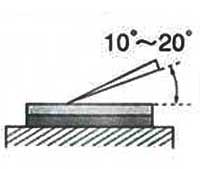
Now it’s time to use the fine grit side of your sharpening stone. You’ll use the same motion as you did on the course grit side, starting with one side of the blade and pulling back along the stone. This will take care of those burrs and hone the blade. Do each side of the blade a few times, then alternate sides (i.e. one stroke across the stone with one side of the blade, then a stroke with the other side, continuing to alternate back and forth.) Continue to alternate sides of the blades for a few strokes across the stone.
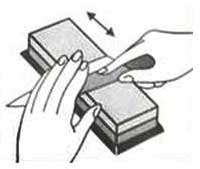
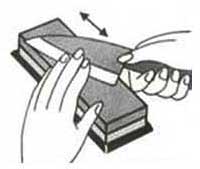
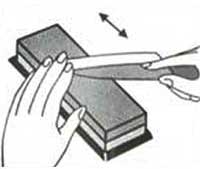
There will still be small burrs present on the blade after honing on the fine grit side, but these won’t impact the performance of your knife. Unless you should choose to strop the blade, your knife is now sharp and ready for use!
Pros and Cons of Stropping
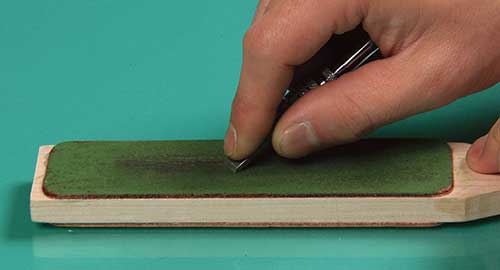
Stropping is done with a leather strop. It works to further hone the blade by removing micro-serrations along the edge of the blade. This makes a great edge if you’ll be using the knife for push-cutting, when you push the knife straight down and through whatever your cutting.
If you’ll be using the knife more for slicing (letting the length of the blade pass along the object you’re cutting) then stropping can make it more difficult to do so as those micro-serrations allow the blade to “grip” into whatever it is you’re cutting.
To further demonstrate the difference, imagine cutting a tomato with a knife that seems to only press against the flesh but won’t cut through the skin -it’s those micro-serrations that make all the difference.
Using a Sharpening Steel (aka Honing Rod)
A sharpening steel is used in between sharpenings to realign the metal of the blade and remove small nicks and indentations. It removes a considerable less amount of metal than sharpening does, so regular honing with a sharpening steel will help to prolong the life of your knife and make it so that sharpening is required less frequently. Many people like to use a honing rod prior to using their knives as it ensures a smooth and sharp cutting edge.
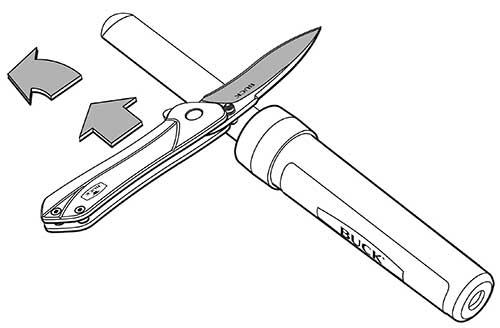
To use, hold the rod in your non-dominant hand at a slight angle so that the tip of the rod is higher than the handle. The exact angle isn’t important; it just needs to be comfortable for you. Hold the blade of the knife against the rod at about a 20-degree angle. This angle also isn’t that important, however, holding the knife at the same angle throughout the process will prove more effective.
With the heel of the blade on the top of the rod, pull the blade toward you so that the entire length of the blade -from heel to tip- runs along the rod. This motion requires you to move your hand, wrist, and arm. If one of those body parts doesn’t move, then the entire length of the blade won’t touch the rod.
Now, hold the blade against the bottom of the rod so that the other side of the blade is touching the rod. Start with the heel of the blade and pull the entire length of the blade along the rod. Once you’ve run one side of the blade along the top of the honing rod and the other side along the bottom of the rod, you’ll have completed one revolution. A total of about seven revolutions is sufficient prior to using the blade.
How to Sharpen a Knife Conclusion
Sharpening a knife is a relatively simple process. For different types of knives, such as serrated or gut hooks, there is a different technique involved and different tools to ensure that you get a consistently sharp blade. However, this method is good for your trusty pocket knife as well as your cutlery set in the kitchen. It will help you get the most of your knife and help to increase its life. After all, you never want to be caught without a sharp knife when you need it most.