Steps on How to use a Milk Steamer
- Tools: espresso machine with milk steamer; stainless steel milk pitcher; steaming thermometer; damp cloth.
- Fill the milk pitcher with cold milk.
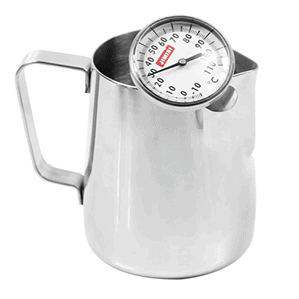
- Attach the thermometer to the side of the milk pitcher before steaming.
- Clear the Steam Nozzle removing any water residue from it.
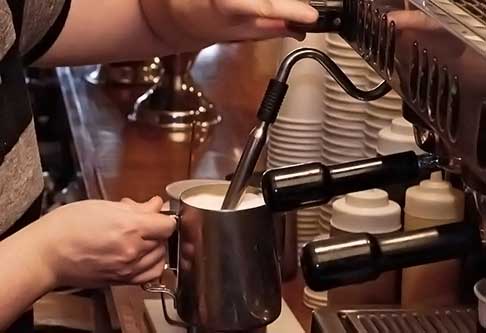
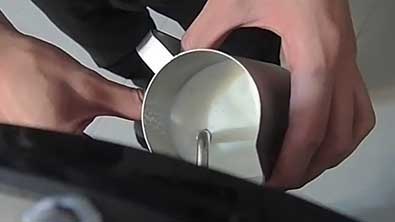
- Steam the milk: Place the nozzle just below the surface of the milk.
- Create Foam by submerging the wand ½ inch under the surface.
- Clear Nozzle: turn on the steam wand for 1 second to remove any remaining milk.
Also referred to as a steaming wand, the milk steamer on an espresso machine is a relatively easy tool to learn how to use, once you know the basics. When it all comes down to it, there are only a few steps involved in learning how to use a milk steamer.
Step 1
Tools for Steaming Milk
Before you get started, of course, necessity dictates that you need to be sure to have the appropriate tools. This means you’ll need access to an espresso machine that has a milk steamer/wand, a stainless steel milk pitcher, a steaming thermometer to avoid scalding the milk, and a damp cloth to clean the wand.
Of course, if you are making a coffee drink then you’ll want to have one or two freshly pulled shots of espresso.
What you’ll need:
Step 2 & 3
Fill the Milk Pitcher and Attach Thermometer
Fill your cold (ideally) milk pitcher with cold milk. Because milk expands as it is steamed, it is important to make sure that you fill your milk pitcher no more than two-thirds of the way full. If you are making a beverage with foam or froth (such as a cappuccino), then fill the pitcher only one-third of the way full to leave room for the milk to double in size.
Attach Milk Thermometer
If you are using a milk thermometer, attach it to the side of the milk pitcher before steaming. Anything over 160 degrees F will affect the flavor of the milk and cause it to be taste burned. Anything under 150 degrees F will cause the flavor of the milk to be overpowering and drown out the taste of the espresso.
Step 4
Clear Steam Nozzle
Immediately before using a milk steamer, it is necessary to remove any water residue from the nozzle of the milk steamer. Do this by carefully turning the wand on for a second or two. Then use the damp cloth to wipe the nozzle clean.
Step 5
Steam the Milk
For lattes or mochas, the process of steaming the milk is relatively straightforward. Simply add your steamed milk to your shot of espresso and your tasty beverage is ready!
Step 6
Creating Foam
Cappuccinos and other drinks, such as a flat white, require “microfoam” which is made up of small bubbles that are uniform in size. For a cappuccino, instead of completely submerging the wand aim to keep it about ½ inch under the surface of the milk. Each machine is different, and this may require some experimentation.
If your foam bubbles are too big, lower the wand. If there is not enough foam, raise the wand. Once the milk temperature has reached almost 150 degrees and the milk has doubled in size with foam, turn the milk steamer off and remove the nozzle.
If you have some bubbles that are too large, these can be eliminated by banging the milk pitcher on the counter two or three times before pouring the milk into the shots of espresso.
Step 7
Clear the Nozzle
Once you’ve removed the nozzle completely from your milk, turn on the steam wand for just one second to remove any remaining milk residue and keep your milk steamer clean.
How to Use a Milk Steamer Conclusion
Learning how to use a milk steamer is a relatively simple process. It may require a bit of practice, particularly to get the proper foaming technique, but ultimately it is an easy skill to learn which will make your coffee habit even more enjoyable!